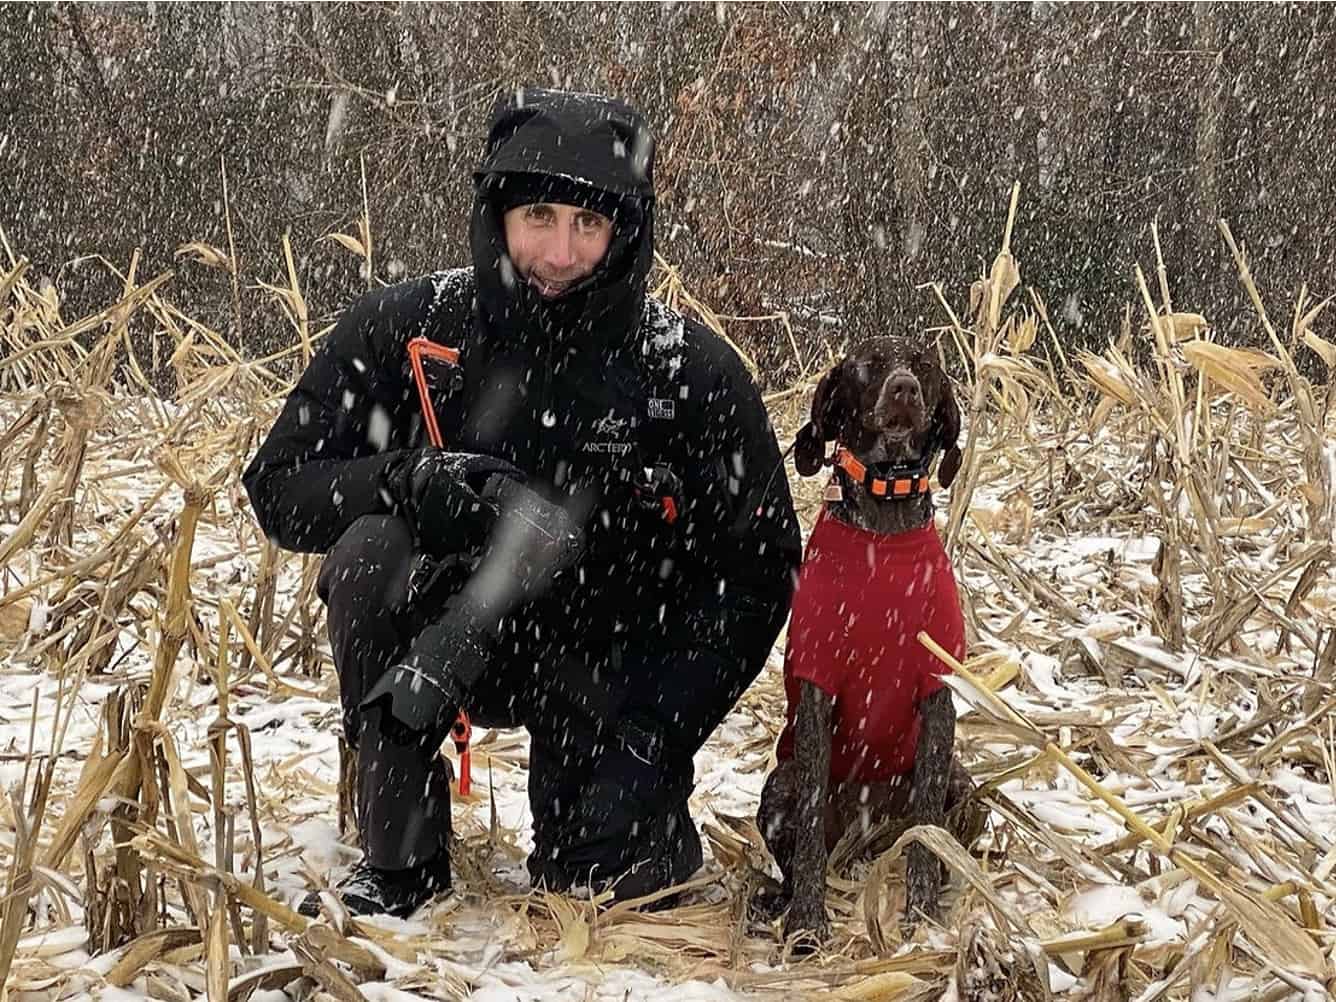
Winter is upon us, and while some view it as the season for bundling up in front of a warm fire with a hot cup of coffee, Kevin Morgan believes it’s prime time for spending time outdoors. Kevin is a filmmaker who started the Shenandoah 52 Hiking Challenge. Here, he lays out the science of layering to get the most out of winter hiking.
Some of the best outdoor activities can be enjoyed outside during the offseason. Just because it’s cold or snowing shouldn’t be a reason to avoid all the benefits of being outside. That said, it also comes with the need for some preparation. We encourage you to enjoy this less trafficked, beautiful time of year.
Rarely will you find a time absent from the crowds, but in many cases winter also provides exceptional views from various summits and overlooks, because the leaves have fallen and tree cover has opened up.
With that, here’s some advice to help you enjoy our family’s favorite time of year. When the cold fronts move in and the earth tilts away from the sun, you will often find us heading into the storm. After all, what good is owning a Jeep and extensive amounts of Gore-Tex if you can’t chase a few storms?
Now, heading into the storm sounds a bit over the top. Frankly most days are quite delightful in the winter, absent a storm. And not every adventure has to be a pilgrimage up the North face of a mountain seeking summit peaks.
Keeping Warm and Getting Out
Your local state park is just as enjoyable as the National Park that’s hours away. That trail that’s near the park behind your house – it’s fantastic to get outside during the winter months. We encourage you to check out those trails and parks that are lesser known or listed on the map. We have written extensively about using mapping tools to find unlisted trails and why certain trails may not be listed on your favorite mapping app.
Before I get too far into the preparedness, if you are curious about finding these trails, we have posted more about this on our blog. Finding the easier treks and areas that are more personal to you will ensure that you get outside – because any trail or outdoor activity is better than no activity at all.

Winter can be for everyone. Layers and equipment are important when it comes to enjoying a hike. For me, warmth is paramount and that includes staying dry. This is where your gear serves to change the trajectory of how you feel about being outdoors. We find that when we have a mishap with our planning in the field, it tends to create a sour taste for wanting to go on the next adventure. If you underestimate the weather or the wind chill, you could find yourself miserable on your trek.
Determining How to Dress for Winter Outdoor Adventures
One of the easiest ways to combat the change in temperatures is to dress in layers. This is no different than dressing for a business occasion or special event. For the outdoors, it’s easy to create layering that addresses the changes in climate and temperature.
Many enthusiasts that are new to outdoors in the off season look for the biggest or warmest jacket, and while that’s great if you’re going to Antarctica on an expedition, many times with hiking your number one source of heat is your own body heat. That also means, you need to divide your clothing into layers. This way you can shed the top layers on the portions of your adventure that are strenuous, and your body is generating more natural heat that can be added back when you are generating less. This also means that quality of gear is important. The reason most Gore-Tex and similar materials are expensive is that the fabric allows for retention of heat and dispels moisture. Gore-Tex holds in heat, and that moisture escapes preventing sweat.
Now you can work around that by layering and ensuring that perhaps that outer layer allows for moisture to “get out of that jacket” and the layers underneath are allowing you to stay warm.
For example, many times when you are hiking, you may have elevation change or a shift between a canopy and open sky that cause a temperature change. That, coupled with physical exertion, will change your body temperature.
- Anticipate roughly a 2-degree temperature change for every 1,000 feet of elevation (e.g. if you hike up a mountain that has a 2,000-foot change from base to summit, you can anticipate the temperature changing by roughly 4 to 5 degrees) plus any wind that may be introduced as you’re trekking up the mountain.
- Elevation change also increases your body temperature with physical exertion, causing you to sweat or release moisture that will, in turn, have implications on how you feel.
- Changes in cloud cover, precipitation and the season will determine if temperature shifts are more or less as you travel on your hike. And if you have minimal elevation change, the temperature could minimally change.
Layering for Warmth and Change in Temperature
So where does that leave us? Layers allow you to remove and add garments as you adventure in the outdoors, but it’s not as simple as adding and removing clothing. We have found that there’s a science for which clothing is used, which layer it is, and how you piece them together. It sounds complex but it’s really about making sure that you have the right materials in the right place.
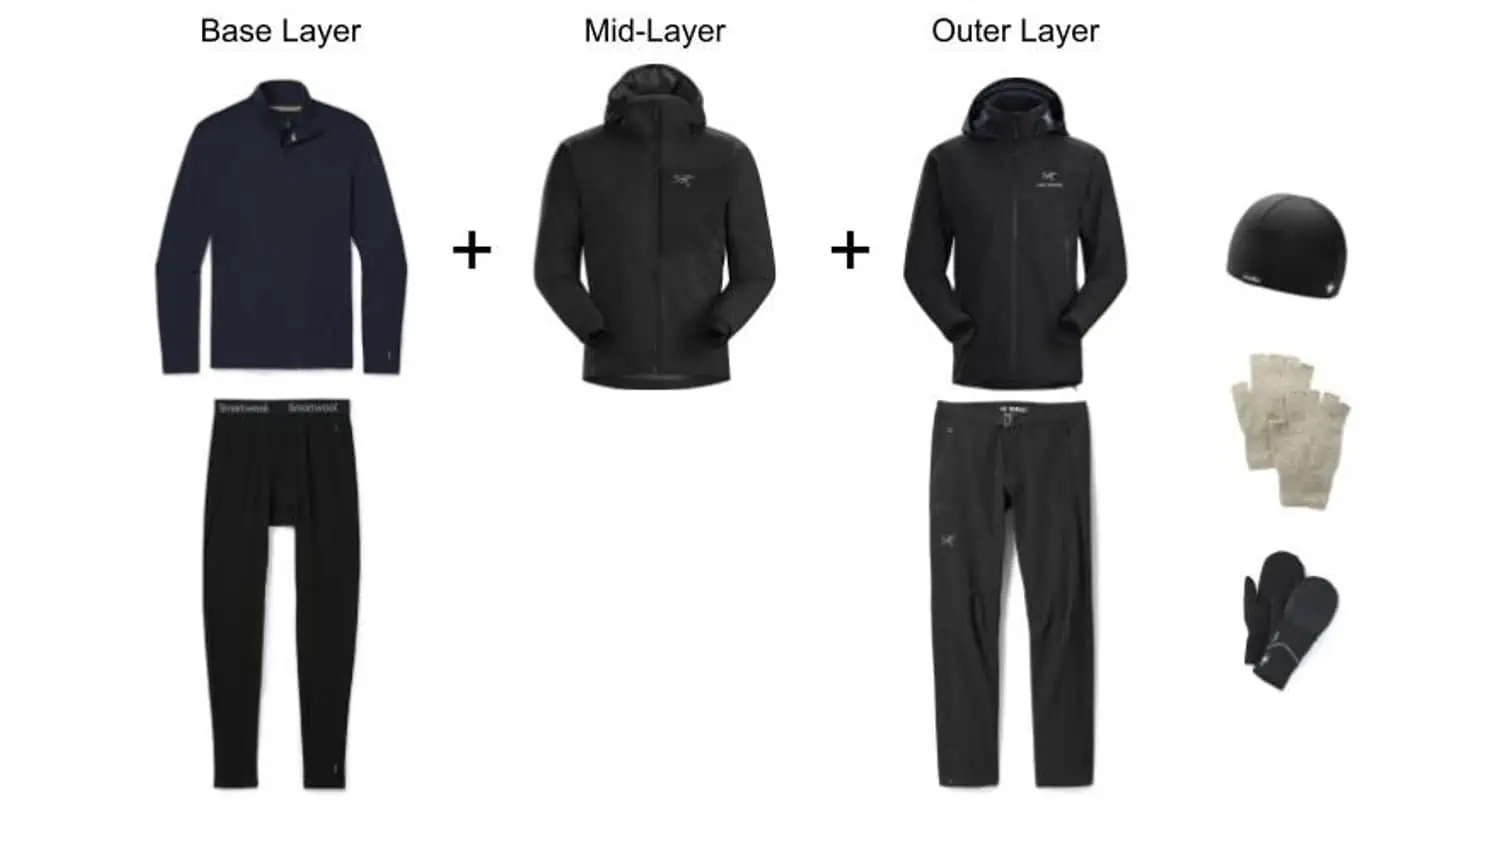
- Core Layer … T-Shirt, Underwear, Socks: This is the core layer. You wake up, you put on the core elements of your wardrobe; everything else stacks on top of this. Ensure that the fabric you’re wearing at the base also is designed for activity. Wicking is good for this layer. Cotton is not ideal in many cases.
- Base Layer: Think of this as the layer that may not come off at all during your trek. You want to make sure that you’re wearing materials that wick moisture away from you at this layer. Our preference is merino wool for this layer.
- Mid-Layer: The layer that serves as insulation and keeps you warm. By adding additional mid-layers, you can increase your warmth. Just as the walls of your house are insulated in the middle, you need to bolster the middle when it’s cold. Typically a puffy jacket.
- Outer Layer: The shell from the elements. If it’s raining, you may have Gore-Tex as your shell. If the sky is clear, you might just have a puffy jacket as the outside layer. Read the label closely and look at the brand’s website to determine how it handles “breathability.” We believe that this is one of the layers where you want to spend the most amount of money when buying equipment. It’s worth the investment.
If helpful, reference our Gear List Page for a recommendation of brands that we choose to wear. This list is not the end-all, and everyone has their preference, but we hope that this will help with direction.
Layering by Temperature Range
This is my rule of thumb. You may need to test and learn based on how you operate. I would rather be hot than cold, and my core body temperature is always slanted toward being cold. So adjust for your own needs.
For each of these diagrams, use them as a compass and not a map for yourself. We don’t outline the base or basement layers – the shirt that you may be wearing, the socks, etc. Assume that you will want that layer. This is everything on top.
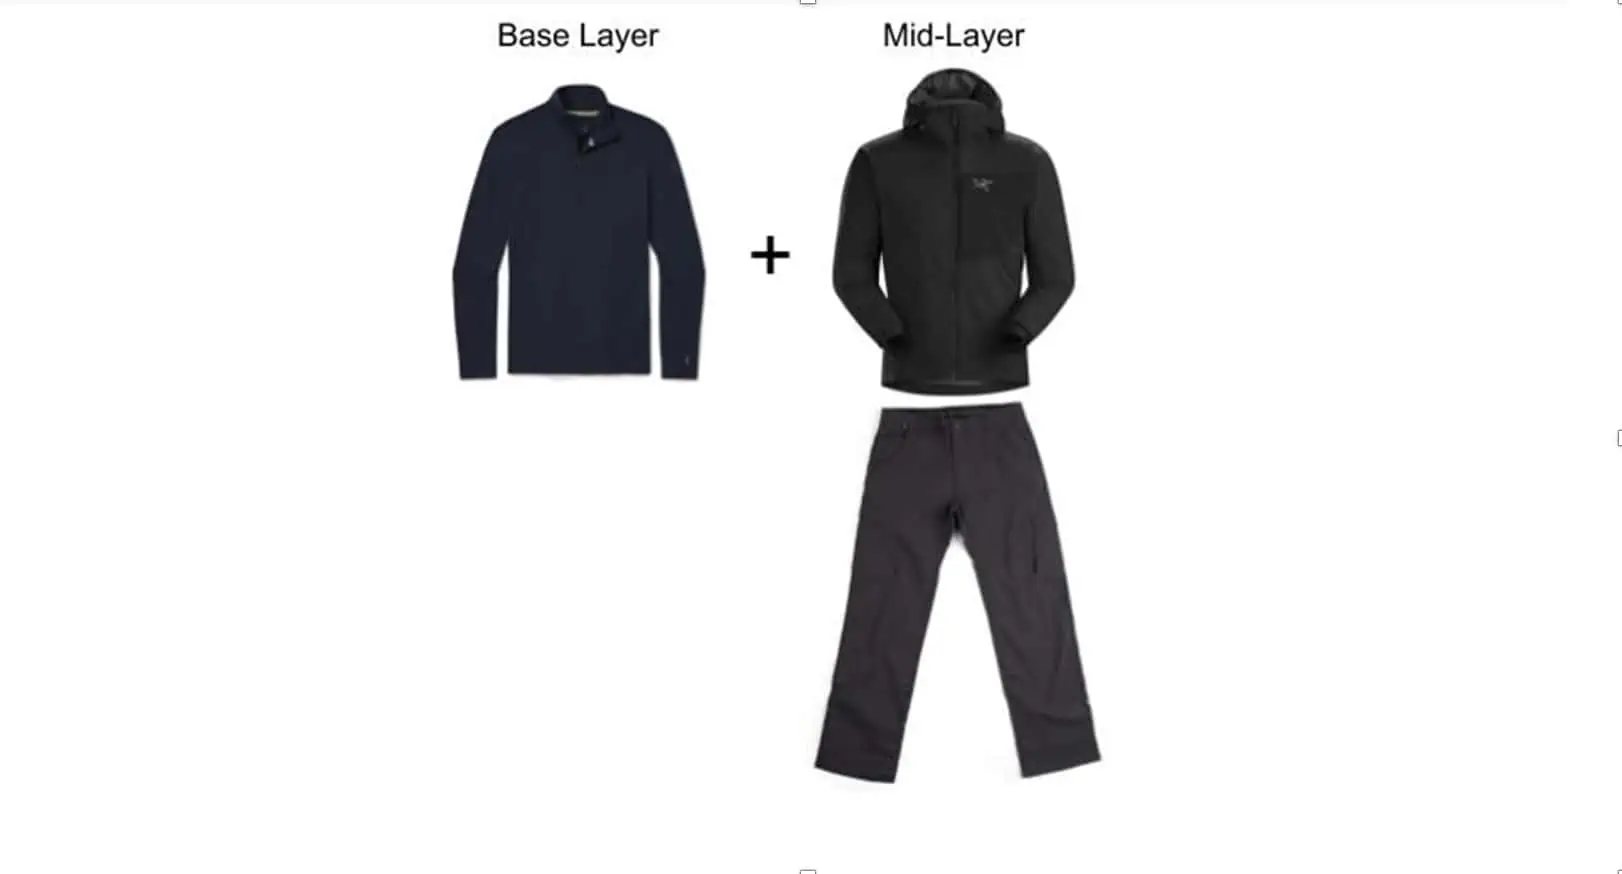
Cool and above mid-to-upper 40s.
Basic layers are typically good for temperatures that are above mid-to-upper 40s without any inclement weather. This allows you to remove the jacket if it gets too warm or remove the base layer and keep the mid-layer. That base layer is typically merino of some sort, and most of the time I am hiking absent the mid-layer jacket.
Cool and above mid-30s with inclement weather
Good for those days where it is not cold, but there’s inclement weather like rain or wind. The shell will help to break the wind. At certain temperatures, you may choose to add a beanie or gloves. This is also where it’s important to look at the “breathability” of that outer layer.
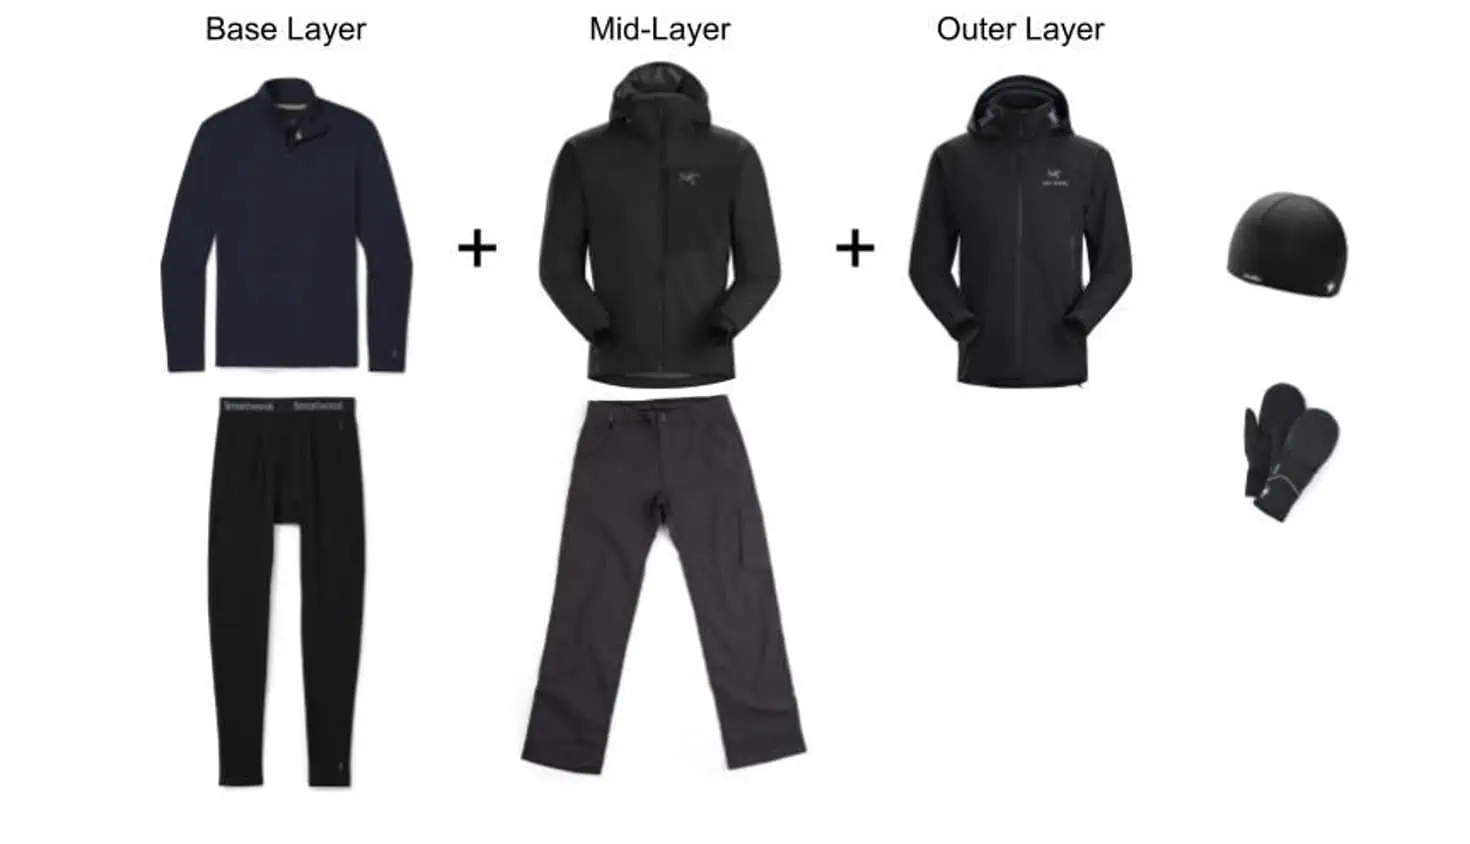
Sub-30s and below, with or without inclement weather
With the more substantial mid-layer jacket, you’re going to be much warmer and need to see which jacket is best for you. As it gets colder, I add heavier beanies and layer my gloves.
Below 20-25s, with or without inclement weather
Adding a second base layer will increase your warmth significantly, and especially if it’s a wicking material that moves the moisture away from your body. Same as before, as it gets colder, I add heavier beanies and layer my gloves. At this point, I might swap the gloves for heavier duty gloves.

These recommended configurations are based on the Gear List that we have published. And each of these configurations is also based on the temperature that we feel comfortable with. My wife may be wearing two more layers than me at the mid-layer in the form of merino (she likes Icebreakers over SmartWool – it’s splitting hairs). You may be wearing two layers less than me. All preference.
The point with this is to think about adding and removing as you trek up and down the mountain. Absent a mountain, think about cloud cover and if you’ll be hiking in the sunlight or shade. It’s incredible how much the temperature feels significantly colder when the sun is not present.
Good, Better, Best: What’s Right for You With Gear
Brand of equipment is very personal decision for many, while others may pick up the first thing in the rack at the local outfitter. We have very specific opinions. However, the easiest way to think about this is by price point. There is an entry, mid, and high-end price point for all gear.
The house brands are often the entry point and for many stores that are outfitter specific, they are actually pretty good products. If you’re going to be outside frequently throughout the year, it’s worth spending more on gear. And if you can’t afford new, buy used. You might need to recharge the weather resistance on the equipment, but that’s no reason not to buy used. There are plenty of YouTube videos that can guide you through recharging DWR.
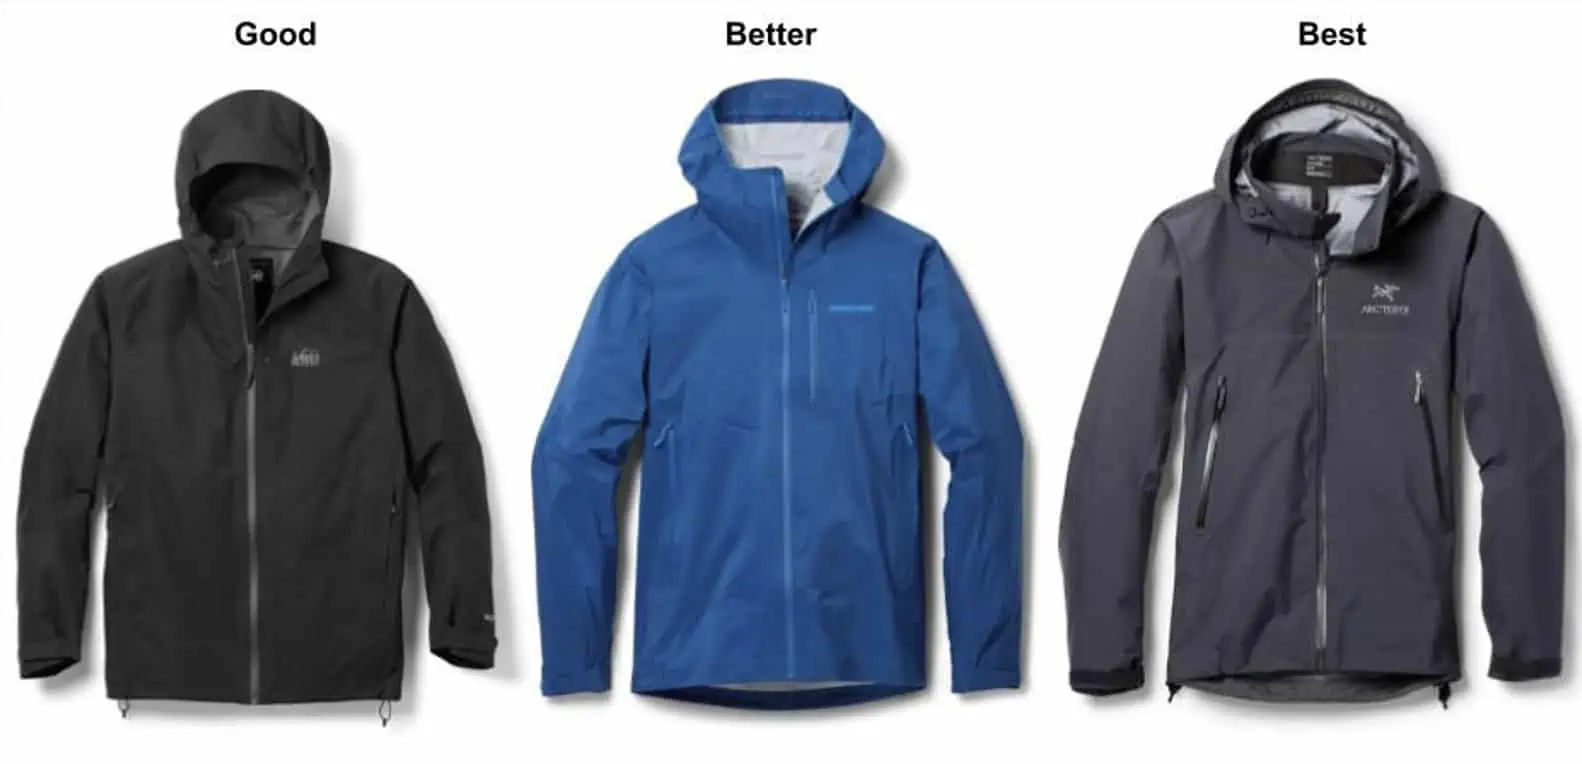
House brand to expedition grade, any of these are great for getting outdoors to start. Each will have a different level of performance when hiking. If you hike frequently, you may consider getting the more expensive gear. If you are infrequently on the trails, you’ll need to decide if the high-end gear is necessary.
This same comparison will work for all the components of your apparel. Thinks of it this way:
- Gore-Tex jackets are made from a material that allows moisture to escape and warmth to be retained. It’s a modern marvel. The North Face has a new technology that’s equal, BUT the point is that if you buy a cheap jacket that does not allow moisture to escape, you will be cold from sweating and you will feel damp. If you run up the trail and exert a lot of energy, all bets are off for ALL fabrics.
- Waterproofing is not waterproofing forever. Many of the jackets have a time rating on them. For example, Gore-Tex v. Gore-Tex Pro vs. Gore-Tex Paclite all have different ratings. Don’t expect waterproofing for more than an hour in the rain with Paclite. On the other end, Gore-Tex Pro will give you quite a bit of time, but it’s stiff as a board.
- Merino wool has a wicking capability that is not the same as other fabrics. You may be well-intentioned to buy something that is performance or cheaper, but you could end up being cold because the moisture has not been wicked from your skin and hasn’t been wicked out of your mid-layer and outer shell.
Each layer aids in the process and when one layer is not performing with the rest, you experience discomfort with your outdoor experience.
I hope that this helps with providing a little more information for you to decide about your layering when out hiking or photographing outdoors. Don’t be deterred by the cold. Get outside and Happy Hiking!
Do you live near Shenandoah National Park? Take the SNP52 Hiking Challenge: 23 trail loops, 52 trail segments and just over 150 miles.
A Pixels and Pointers partnership with the Shenandoah National Park Trust.